

Showing posts with label sewing with kids. Show all posts
Showing posts with label sewing with kids. Show all posts
Wednesday, January 23, 2013
Robot squishy
Here's a picture of a robot taggie/squishy/noise makey thingy I made before Milo was ever born. It hangs from his car seat and he loves it. It crinkles when you play with it. Ady actually helped me design and sew it. And for the belly I had her scribble and then I sewed over her scribbles. You can't see the belly but it looks very roboty.


Thursday, April 19, 2012
Sewing with kids-fabric fairy
Maybe I should start calling this crafting with kids since this is another non-sewing post. But I wanted to share it since it give another idea of something a small child can do with fabric.


Corduroy drew a fairy and then cut out some fabric and dressed it. She just glued down the fabric. Simple, fun and it kept her entertained while I got some projects done.
Wednesday, March 7, 2012
Expecting Perry the Platypus
My girls have been so excited for their new baby brother. My 6 year old has been waiting for a brother for years and her best friend just welcomed a new brother into her home a few weeks ago which has made the waiting in our house all the harder.
To help with the waiting and to help them feel involved we have been making him presents.
These onesies were made with fabric crayons we bought at JoAnns. The girls just colored on paper and I ironed on their designs.


Corduroy insisted on cutting hers out. I don't recommend this for a couple reason.

1. It makes it really hard to iron on. You don't want the paper to move or the picture will look blurry, so if you have nothing to hold onto then your iron has to carefully stay in one spot. I ended up with spots where the holes in the iron are. I tried to correct it but you can still kind of see them.

2. The pictures had an outline and she cut part of that off so when it was ironed on it looked like I missed part of the picture.
 Ady drew a picture of me so the baby would know what I look like. How thoughtful?

Corduroy also wanted to write the names of what she drew underneath.When she first wrote it out she realized right away that the name would be backwards so she chucked her papers and whipped out the words written perfectly backwards without any help or thought. It was pretty impressive for a Kindergartner.


And because Ady thinks this baby is going to be named Perry the Platypus we had to have a Perry onesie for him.In hopes of her not getting to attached to the name we have talked with her about it and a couple days ago she said that could be his middle name.

If this baby decides to come when the others did I will be in the hospital today. Hopefully that's the case!
And for another variation of this check out Delia's onesies she made with her boys. They are adorable. More work but so worth it I think. If I hadn't already made these I think I would have gone the freezer paper route. The colors are richer and more artistic looking.
To help with the waiting and to help them feel involved we have been making him presents.
These onesies were made with fabric crayons we bought at JoAnns. The girls just colored on paper and I ironed on their designs.


Corduroy insisted on cutting hers out. I don't recommend this for a couple reason.

1. It makes it really hard to iron on. You don't want the paper to move or the picture will look blurry, so if you have nothing to hold onto then your iron has to carefully stay in one spot. I ended up with spots where the holes in the iron are. I tried to correct it but you can still kind of see them.

2. The pictures had an outline and she cut part of that off so when it was ironed on it looked like I missed part of the picture.


Corduroy also wanted to write the names of what she drew underneath.When she first wrote it out she realized right away that the name would be backwards so she chucked her papers and whipped out the words written perfectly backwards without any help or thought. It was pretty impressive for a Kindergartner.


And because Ady thinks this baby is going to be named Perry the Platypus we had to have a Perry onesie for him.In hopes of her not getting to attached to the name we have talked with her about it and a couple days ago she said that could be his middle name.

If this baby decides to come when the others did I will be in the hospital today. Hopefully that's the case!
And for another variation of this check out Delia's onesies she made with her boys. They are adorable. More work but so worth it I think. If I hadn't already made these I think I would have gone the freezer paper route. The colors are richer and more artistic looking.
Tuesday, February 7, 2012
Sewing with kids- Freestyle
I haven't done a sewing with kids post in awhile. I haven't really been making anything with them lately. Just letting them roam the craft room and experiment on their own.
Mostly it has been letting my 3 year old cut fabric into the tiniest pieces possible. Her favorite thing to do when I sew while little sister is taking a nap. It makes a HUGE mess but it keeps her busy so I can get things done. I also make her clean it up which keeps her busy for even longer.

Something my 1 year old loves to do is put pins in fabric. Her favorite thing to do while her 2 older sisters are asleep and she stays up late.


Mostly it has been letting my 3 year old cut fabric into the tiniest pieces possible. Her favorite thing to do when I sew while little sister is taking a nap. It makes a HUGE mess but it keeps her busy so I can get things done. I also make her clean it up which keeps her busy for even longer.
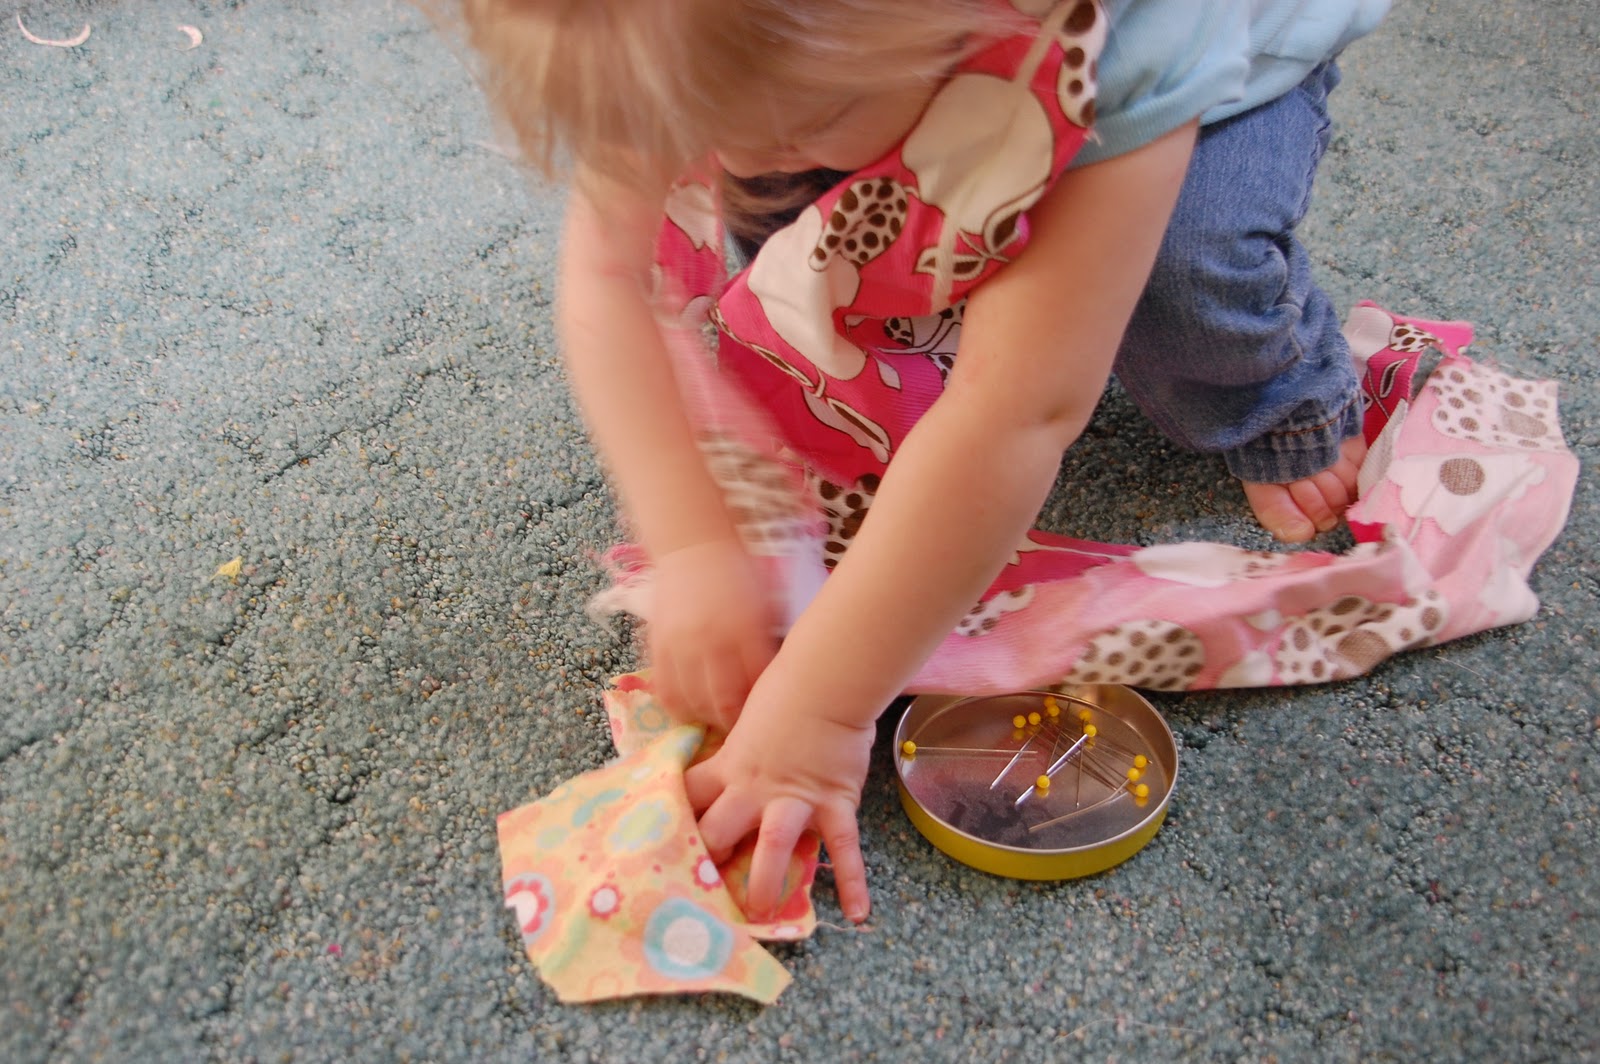
Something my 1 year old loves to do is put pins in fabric. Her favorite thing to do while her 2 older sisters are asleep and she stays up late.


Tuesday, January 31, 2012
Sewing With Kids- The Not Sewing Post
I did find this craft kit on Amazon and had to share. It looked like so much fun I ordered it with birthday money that was given to my 6 year old recently. The day it came both little sisters were sleeping and we ran upstairs, opened it right up and made something.

She was SO excited about it and can't wait to make more things.
The kit comes with everything you need to make 20 crafts. And they are all made from recycled things which my Kindergartner is way into right now. All the crafts seem pretty simple and the directions are in pictures but a tad confusing for a 6 year old so I had to help a bit to find the right pieces for the craft.
Also, the paper that the cupcake in the picture is made from is used in several crafts and if any of you have every used it you know that nothing sticks to it very well. Especially a glue stick trying to hold 2 pieces together to make a box. So we did have to pull out the glue gun for a couple things but she has still had fun making the few crafts we have so far.
All in all I would recommend it for anyone who has a kid who loves to make things!

She was SO excited about it and can't wait to make more things.
The kit comes with everything you need to make 20 crafts. And they are all made from recycled things which my Kindergartner is way into right now. All the crafts seem pretty simple and the directions are in pictures but a tad confusing for a 6 year old so I had to help a bit to find the right pieces for the craft.
Also, the paper that the cupcake in the picture is made from is used in several crafts and if any of you have every used it you know that nothing sticks to it very well. Especially a glue stick trying to hold 2 pieces together to make a box. So we did have to pull out the glue gun for a couple things but she has still had fun making the few crafts we have so far.
All in all I would recommend it for anyone who has a kid who loves to make things!
Tuesday, December 20, 2011
Sewing with kids-Christmas gift for teacher
My 5 year old daughter wanted to make the Christmas tree garland for her teacher. I thought it was a great idea but was totally garlanded out from making 5 of them so I told her she could sew them herself. She of course was thrilled since we haven't been doing too much sewing lately.

 I let her do all the tree sewing and turning and stuffing. I sewed up the trunks since they were tiny but she turned them right side in and did all the trimming. She also picked which trunks to go with which trees and what order to sew them on the garland.
For full directions on how to make them click here.
Here is her version.
 Then we packaged them up in a paper bag she decorated herself and a card she made.
 I added pictures of her sewing the garland for her teacher to see.
 Her last day of school before the break is tomorrow. She is putting the gift in her bag as I am typing this. Kinda last minute, but it is done and Corduroy is so excited to give it to her!
And here is another tip in case you don't have a small table for your kids to sew on. (Or you are too lazy to bring the one you have back upstairs for your kids like me)
Just put a box under your table and place the foot on it. Works great!


For full directions on how to make them click here.
Here is her version.


And here is another tip in case you don't have a small table for your kids to sew on. (Or you are too lazy to bring the one you have back upstairs for your kids like me)
Just put a box under your table and place the foot on it. Works great!
Sunday, December 11, 2011
Lalaloopsy Party
Let's face it, Lalaloopsy dolls are stinkin cute with their big button eyes staring at you! And being a crafty mom I couldn't resist talking my daughter into picking that theme for a party. It just sounded way better than a princess themed party. So many more exciting things to do.
In keeping with the theme we did lots of crafty things at the party. My 6 year old loves crafts and sewing and I knew she would have a lot of fun with this theme.Sugar crumb cookie being the favorite doll since her and the birthday girl share December birthdays.
The girls helped me decorate the table.
 Wearing her apron I made
 I made the birthday girl a skirt, apron and shirt Lalaloopsy style.

The first thing we did was color while we were waiting for everyone to get here. I made paper dolls for the girls.


Next we made button cookies. I had the cookies all pre-cut. They smashed the middle down with a cup to make a rim and then poked holes with chopsticks and decorated with sprinkles.I wrote their names on wax paper next to the cookies so I knew who they belonged to.

While the cookies were baking we got to work on our last activity. The sewing one. I was a tad nervous. Husband at work. No moms stayed. Lots of girls who had never sewed before. But they did awesome! My 1 year old was taking a nap and we all finished the dolls.
I wanted a sewing project but I wanted the end result to be something the girls would be excited about but it also had to be way simple for them. I made all the dolls ahead of time.
 I had them all labeled and thread and needles ready to go. I used a disappearing pen to draw a mouth on the face and they all stitched the mouth on themselves.
 I had Corduroy and Ady make theirs ahead of time so there would be 2 less girls to worry about that day.
 Besides my 3 year old the ages ranged from 6-12.

 After the faces were sewn on I sewed them up leaving the bottom open and let them stuff the dolls. Then I sewed up the bottom for them. Super easy for first timers. The 12 year old helped some of the others when they needed it and even made an extra for a friend who couldn't make it because she was sick. How sweet is that?
Next was opening presents and then the cake.
 I used the handles from the packaging of the dolls to put on the cake, as well as the dolls themselves.I can make a lot of things but cakes are not my specialty. Yeah for toys to decorate with! Each layer inside was a different color. It was fun to hear the girls reaction when I cut into it.

I made the party bags. Couldn't resist. They are just so much cuter than store bought even though it is more work.The mouse is sugar crumb cookies pet.
 I tagged them all with everyone's names so we could stick their crafts inside as they finished them up.
 They ended up taking home their colored paper dolls, 4 button cookies I had bagged up, their stuffed doll they made and a pencil topper and eraser.
During the party a few girls said this was "the funnest party ever!" Gotta say I love hearing that!
In keeping with the theme we did lots of crafty things at the party. My 6 year old loves crafts and sewing and I knew she would have a lot of fun with this theme.Sugar crumb cookie being the favorite doll since her and the birthday girl share December birthdays.
The girls helped me decorate the table.


The first thing we did was color while we were waiting for everyone to get here. I made paper dolls for the girls.


Next we made button cookies. I had the cookies all pre-cut. They smashed the middle down with a cup to make a rim and then poked holes with chopsticks and decorated with sprinkles.I wrote their names on wax paper next to the cookies so I knew who they belonged to.

While the cookies were baking we got to work on our last activity. The sewing one. I was a tad nervous. Husband at work. No moms stayed. Lots of girls who had never sewed before. But they did awesome! My 1 year old was taking a nap and we all finished the dolls.
I wanted a sewing project but I wanted the end result to be something the girls would be excited about but it also had to be way simple for them. I made all the dolls ahead of time.


Next was opening presents and then the cake.


I made the party bags. Couldn't resist. They are just so much cuter than store bought even though it is more work.The mouse is sugar crumb cookies pet.


During the party a few girls said this was "the funnest party ever!" Gotta say I love hearing that!
Wednesday, July 13, 2011
Sewing with Kids
Here is our latest project. It took a few weeks to complete since my daughter is still young(5). Sometimes she gets tired or bored with it and sets it aside and sometimes she get frustrated so I make her stop because that means she is tired.
I usually sew with her at night after the younger girls have gone to bed and I always do my projects in sessions. Night 1 was picking out fabric and cutting out the pattern and fabric.

Night 2 was sewing the hearts on. She loves using my fancy stitches on my machine so we spent a whole night sewing on the hearts in rainbow color. I have her do all the sewing while I press the pedal. (her machine is low enough for her to press the pedal on her own)
Nights 3- whenever we finished were stitching the sides and handle. This is where I would have her stop whenever she seemed tired. This took longer because we had to keep re-threading her needle because she hasn't learned to hold is correctly yet. I think that comes with experience. The last day of her sewing she was finally able to re-thread her needle herself and she was so excited! I was too. I love spending this time with her but it is a lot of work for me sometimes. But the more she can do on her own the less work it is for me and becomes more fun for both of us.
 She got tired of doing the stitch I showed her at the beginning and went right back to the straight stitch. She asked me if she could. Of course, it is her purse and she should make it the way she wants.
I usually sew with her at night after the younger girls have gone to bed and I always do my projects in sessions. Night 1 was picking out fabric and cutting out the pattern and fabric.

Night 2 was sewing the hearts on. She loves using my fancy stitches on my machine so we spent a whole night sewing on the hearts in rainbow color. I have her do all the sewing while I press the pedal. (her machine is low enough for her to press the pedal on her own)
Nights 3- whenever we finished were stitching the sides and handle. This is where I would have her stop whenever she seemed tired. This took longer because we had to keep re-threading her needle because she hasn't learned to hold is correctly yet. I think that comes with experience. The last day of her sewing she was finally able to re-thread her needle herself and she was so excited! I was too. I love spending this time with her but it is a lot of work for me sometimes. But the more she can do on her own the less work it is for me and becomes more fun for both of us.

Wednesday, July 6, 2011
Sewing with Kids- Book Review
I know you thought I forgot but I have just been a tad busy/sick/lazy to do much.

This book was sent to my daughter as a birthday present from her cousins and she LOVES it. She actually falls asleep reading it most nights dreaming of making things.
We have done a couple things inspired from this book but just finished our first real project from the book and I will show it to you next week. Since she already has a know how of pattern cutting and can do 2 stitches, she had a really easy time with the project. She can even now re-thread her needle(as of this project). YEAH! for me cause I was having to do it for her so often.


The book is really cute and if fairies aren't your thing, there are a bunch of other themes by the same company. Something for every boy and girl. And if you need more fairies, there are more than 1 fairy book.

This book was sent to my daughter as a birthday present from her cousins and she LOVES it. She actually falls asleep reading it most nights dreaming of making things.
We have done a couple things inspired from this book but just finished our first real project from the book and I will show it to you next week. Since she already has a know how of pattern cutting and can do 2 stitches, she had a really easy time with the project. She can even now re-thread her needle(as of this project). YEAH! for me cause I was having to do it for her so often.


The book is really cute and if fairies aren't your thing, there are a bunch of other themes by the same company. Something for every boy and girl. And if you need more fairies, there are more than 1 fairy book.
Wednesday, May 25, 2011
Sewing with Kids- Teachers Gift Edition
Since my daughter loves to sew I wanted her to be involved in making the teachers gift this year. Not that I had ever made anything before this year, she is just now graduating preschool. She has 4 different teachers at her preschool and they have all helped her out so much with opening her up and getting her to talk so I wanted to make sure they knew how much we appreciated them.

I decided to start with what I had on hand and that was aprons already halfway made. They just needed a band and a pockets. I also already had cute food fabric so I went from there. I made the aprons and then had Corduroy help with matching dishtowels.
She wanted to cut the fabric into a heart shape. She did the pattern, cutting and stitching.

I knew that would be a little plain so we also used these fabric crayons she got for her birthday. You just color with them on white paper and then iron the design onto your fabric. Super simple, crayons can be found at JoAnns, but the design just wasn't very dark. So it looked a little more silly than cute. But still, fun for Cordy cause she loves coloring.

Then, since it still needed a little something more, I stitched a thick heart stitch that my machine has across the bottom. That made it look finished.
 She picked out which color went with which teacher, they best part was that I was thinking of the same colors for the same teachers.


Then she made a card for each of her teachers and stuck them all in a bag.

I decided to start with what I had on hand and that was aprons already halfway made. They just needed a band and a pockets. I also already had cute food fabric so I went from there. I made the aprons and then had Corduroy help with matching dishtowels.
She wanted to cut the fabric into a heart shape. She did the pattern, cutting and stitching.


I knew that would be a little plain so we also used these fabric crayons she got for her birthday. You just color with them on white paper and then iron the design onto your fabric. Super simple, crayons can be found at JoAnns, but the design just wasn't very dark. So it looked a little more silly than cute. But still, fun for Cordy cause she loves coloring.

Then, since it still needed a little something more, I stitched a thick heart stitch that my machine has across the bottom. That made it look finished.


Then she made a card for each of her teachers and stuck them all in a bag.
Subscribe to:
Posts (Atom)