Showing posts with label Super Saturday. Show all posts

Monday, September 30, 2013

Super Saturday 2012

Last year's Super Saturday was pretty kick back. We did most of the crafts in the same room at the same time. I had one other person on my committee to help out so we did a few simple crafts and an easy dinner. I can't remember the cost of each craft but they were all under $5 and all made great gifts.

OlliBlocks

These are so cute and still make me happy to look at them.


Necklaces
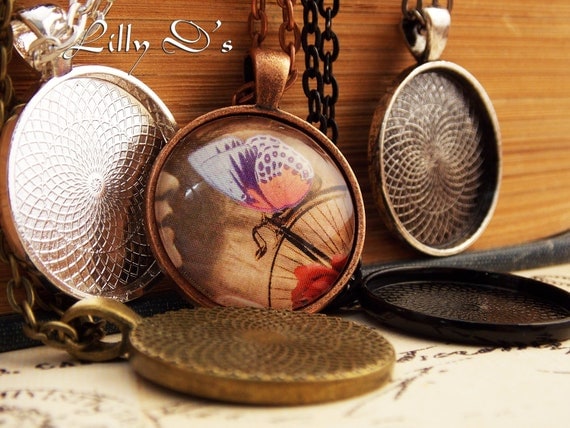
This shop was amazing to work with. I received all my items so quick. We used scrapbook paper and pictures to make them with. I printed my pictures off on cardstock on an inkjet printer and used modpodge to glue together and they are still holding up just fine a year later. 


Nativity Pillow
The teacher used this picture as inspiration and made her own silhouette. She had all the pillow forms cut out, we just painted and then sewed up 3 sides  and stuffed them after they dried. 
Flower Earrings

Last minute through Pick Your Plum I got an awesome deal on cute flower earrings. They ended up being pennies to make. I just bought them and then had the ladies pick them out the day of to make. They all sold.


We also had a service project going on at the same time for those who didn't want to make any of the crafts. I would recommend NOT doing this. It was too much and the ladies just wanted to sit around and talk.

Sunday, September 29, 2013

Super Saturday 2013

This is the 3rd year that I have been in charge of Super Saturday and I love it! This year was a bit of a challenge since I will hopefully have a 2 week old on the day of Super Saturday. Since our ward(congregation)  is small and I don't have too many people on my committee to help (one person) I had to reach out to the members to help out. In the past I have come up with the crafts myself since I am usually the committee.

This year I held a meeting asking for teachers and got a good group who volunteered. I put them in charge of everything. My mom will be in town to help out with the baby and in case anything goes wrong, I don't HAVE to be there. So grateful for those helping me out!

I wanted to post our crafts since I have seen so many pins for Super Saturday in case I can help anyone out with ideas.

Articles Of Faith
$3
(don't go to Staples for the printing, find a ma and pa store)

I ended up doing one because I found it, I was already gonna make it and I can just leave it on a table with instructions. It's from this pin for Article of Faith Cards. 

It's a free printable and my girls are already loving using them to learn the Articles of Faith.


A Frame Tent
$9

These are everywhere and so cute! On another blog the cost was less but we added another piece on the bottom so the tent wouldn't fall flat but hold it's frame. The ladies need to provide their own sheets or fabric. 


Button Ornament

$2.30 
We found cheap buttons at Wal Mart which really brought down the cost since it takes around 70 buttons.


Custom Name Frame
$5 for supplies (you provide your own frame)
 We have an amazing scrapbooker/paper guru in our ward who does amazing things with stamps.


Glamour Frame
$5 w/frame included

$2.50 if you provide your own frame


Extender Slip
$6.50
You provide your own slip ($7 at Wal Mart)
(Can you tell we live in a small town, Wal Mart is pretty much our only store.) These are everywhere on pinterest and so cute. I made mine a couple years ago and it is such a good idea for Super Saturday. The teacher found lace online for a good price.

how do you like my middle of the night picture
So that's it for our crafts. I have our sign ups already going around and will stop them a few weeks before so we have plenty of time to order supplies. We will also be serving a light lunch and will be having the RS sisters take turns babysitting since we have a lot of moms with husbands who work crazy hours. 

Tuesday, November 29, 2011

Super Saturday-Thank yous

Super Saturday was such a HUGE project! I had never done one before or even attended one so that made it that much harder to figure things out. I had so many people willing to help out and take on the projects that I gave them. It made things so much easier one me since I dove into this without knowing if I would even have any teachers for the projects I picked.

I was still in major sewing mode(and still am. Can't stop)

So I whipped up these super cute tea towels for the teachers. I may have made an extra set for myself to keep...


All the workers at JoAnn's may or may not know me by name and yell it across the store whenever I head in there. (Think Cheers). It's pretty awesome!

Sunday, November 27, 2011

Super Saturday-Apron

We didn't get very far on these aprons. I felt bad because it had been a long day for everyone and while we were all supposed to be sewing these babies up I was running around trying to clean so that we weren't at the church till midnight, when I should have been helping everyone.

Here is my finished product. It turned out so cute! It was really fast. I made this in one evening after the girls went to bed and I still got to bed on time. These would make such fun Christmas presents. You can never have too many aprons (says the girls who has tons hanging in her kitchen and even more stored away...)

Friday, November 25, 2011

Super Saturday-Quiet books

A lot of the younger couples at my church wanted to do quiet books. I know they were thinking cute felt activity books but there was no way we would have the time to finish even a page. I have made one. They take FOREVER!

Searching on pinterest I came across these really cute pages from this company. Finch Family and Games.
They have so many activity pages to put in a quiet book. The colored ones cost $1 to buy so I bought 5 different ones. It was hard to narrow it down to that. They are made to put in folders but I liked them in binders inside sheet protectors.

I got some magnets from JoAnns and put them on the back paper under the sheet protector and then on the back of the laminated cut outs. They stick pretty well as long as you get the thicker magnets. Not the thin kind.


I did a few extra things in my own binder for my girls and nephew who will be getting one of these in the mail for Christmas(shhh, don't tell him MW)
I added a place to hold all the little cut outs.

And then for my daughter I added a few coloring pages. I turned pictures I had taken into black and white sketch pictures and put them in a sheet protector. They she can use white board markers or white board crayons to color on top of the sheet protector and wipe off.


Sunday, November 20, 2011

Super Saturday- Christmas Tree Garland with DIRECTIONS


This is the class I taught. I had one lady who was so terrified to sew. She had tried and failed years before, but was so determined to make these. She did awesome and was the first and only one to actually finished the garland in the time allotted and even for the whole day. Others worked overtime and didn't finish.


If you want to make your own I don't have a pattern but you just cut out a triangle and a square in the size you want and then follow these directions:
Christmas Tree Garland

1.    Cut out 10 trees and 10 trunks (2 fabric pieces per tree)
2.    Sew 2 sides of tree leaving bottom open to turn right side
3.    Trim thread
4.    Turn right side in
5.    Turn bottom of trees inside for seam and iron
6.    Stuff trees
7.    Sew 3 sides of trunks, trim and turn right side in
8.    Pin trunks into place and sew bottom
9.    Hand stitch bakers twine onto trees (8 inches from each end and trees 6 inches apart)


oh, and when you are cutting out so many trees and need a quick way to turn the fabrics facing the wrong way to sew them together, here is a quick tip:
 Grab the top piece of fabric...
 and place it on the bottom...
now all your pieces are facing each other and you are ready to sew them together. 
I also use chopsticks when I am turning them right side to poke in the corners to get those corners all the way out.

Easy Peasy!

Saturday, November 19, 2011

Super Sat- Nativity with DIRECTIONS

Here is an after picture of the Nativity picture we made. 

It was quick and easy to make and I live the simplicity in it. I found frames at the dollar store and I ended up spray painting all of them since we were running short on time. I also had squares cut out of all the fabric with fusible webbing and pattern pieces for everyone to cut out. I places them all in individual bags along with instructions to make it easy and so they could do at their own pace. Here is what was printed:


Christmas Nativity
1.    Spray paint picture frame and leave to dry
2.    Iron fabric onto fusible webbing.
3.    *Place and hold iron on medium setting on paper side of adhesive for 5 seconds (or until stuck). Repeat by gliding iron to new area and pressing slightly until entire surface area is bonded.
4.    Cut fabric to desired shape. Peel off paper backing.
5.    *Place material, adhesive side down, in desired position on top of project. Press and hold iron for 8-10 seconds(or until stuck) until entire piece is bonded.
6.    Stitch around picture if desired.
7.    Place in frame when frame is dry.

*Please note that each brand of fusible webbing has different directions so if you make these make sure to follow the directions of the brand you bought.

Tuesday, November 15, 2011

Super Saturday aftermath-temple blocks

Last week was crazy busy and I am glad I have a few days to recover before the next round of life starts. There are a lot of things that need to be cleaned and feed at my house.

I wanted to post a few pictures of the day and what everything looked like after we made it. I don't have pictures of everything yet so I will slowly be posting them.

The temple blocks turned out great and were probably the most completed craft. I didn't do too well on the time frame front. Note to self: when planning these things always take into account gab time.


 My friend Leandra taught the class and did a great job!
Finished product before the ribbons. I had to finish mine at home because I was busy getting ready for the other classes but I did get them painted while I was there. Pretty proud of myself since I did so many.

I don't remember if I mentioned this before but we made ours larger than recommended on the website. We printed the pictures off at 5x7. I also jumped on Picnik and added different sayings to the blank pictures she offered on the website. Most of the ladies wanted Families Are Forever. There were also a few that did Once Upon a Time.Here is the link again in case you want to make your own. It only ended up costing us $2.25 each to make them.

Tuesday, November 8, 2011

Super Saturday

This weekend is going to be a craft day at my church. Some like to call it Super Saturday. I am in charge and am really excited but have never actually been to one so we shall see how it goes. My ward out here is kinda small but I managed to round up helpers to make things.

Here is a preview of the crafts we will be making.

Click HERE for the link to this project's toutorial. We decided to make ours a little bigger but it still ended up only costing $2.50 each. And we decided to offer all the temples from this site along with a few different sayings and ribbons so they could really be personalized.

This is my favorite. I found this garland on pinterest, It is for sale overseas. I just made my own. These came to $2.60 each for a 6 foot garland!

We are also making a quiet book from some of these cute pages. You can buy them HERE. I bought 5 activities. $1 each activity and then you print them yourself. They are already colored so all we have to do is laminate and stick magnets on them.

This is another image I found online and copied. I found a dollar store frame I spray painted and then chose a white cotton background and some printed cotton fabrics for the nativity scene. We will just be using fusible webbing to iron it on. I will probably take mine home and sew around it but you don't have to. This ended up being $2.50 to make.


We are also making this apron:


To put in this jar:

I also have a friend who is making really cute cards and tags for us to stamp and make.

It's gonna be a lot of fun. Lunch after and lots of chatting with friends! I'll post pictures of the after next week.